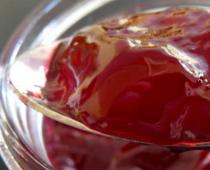
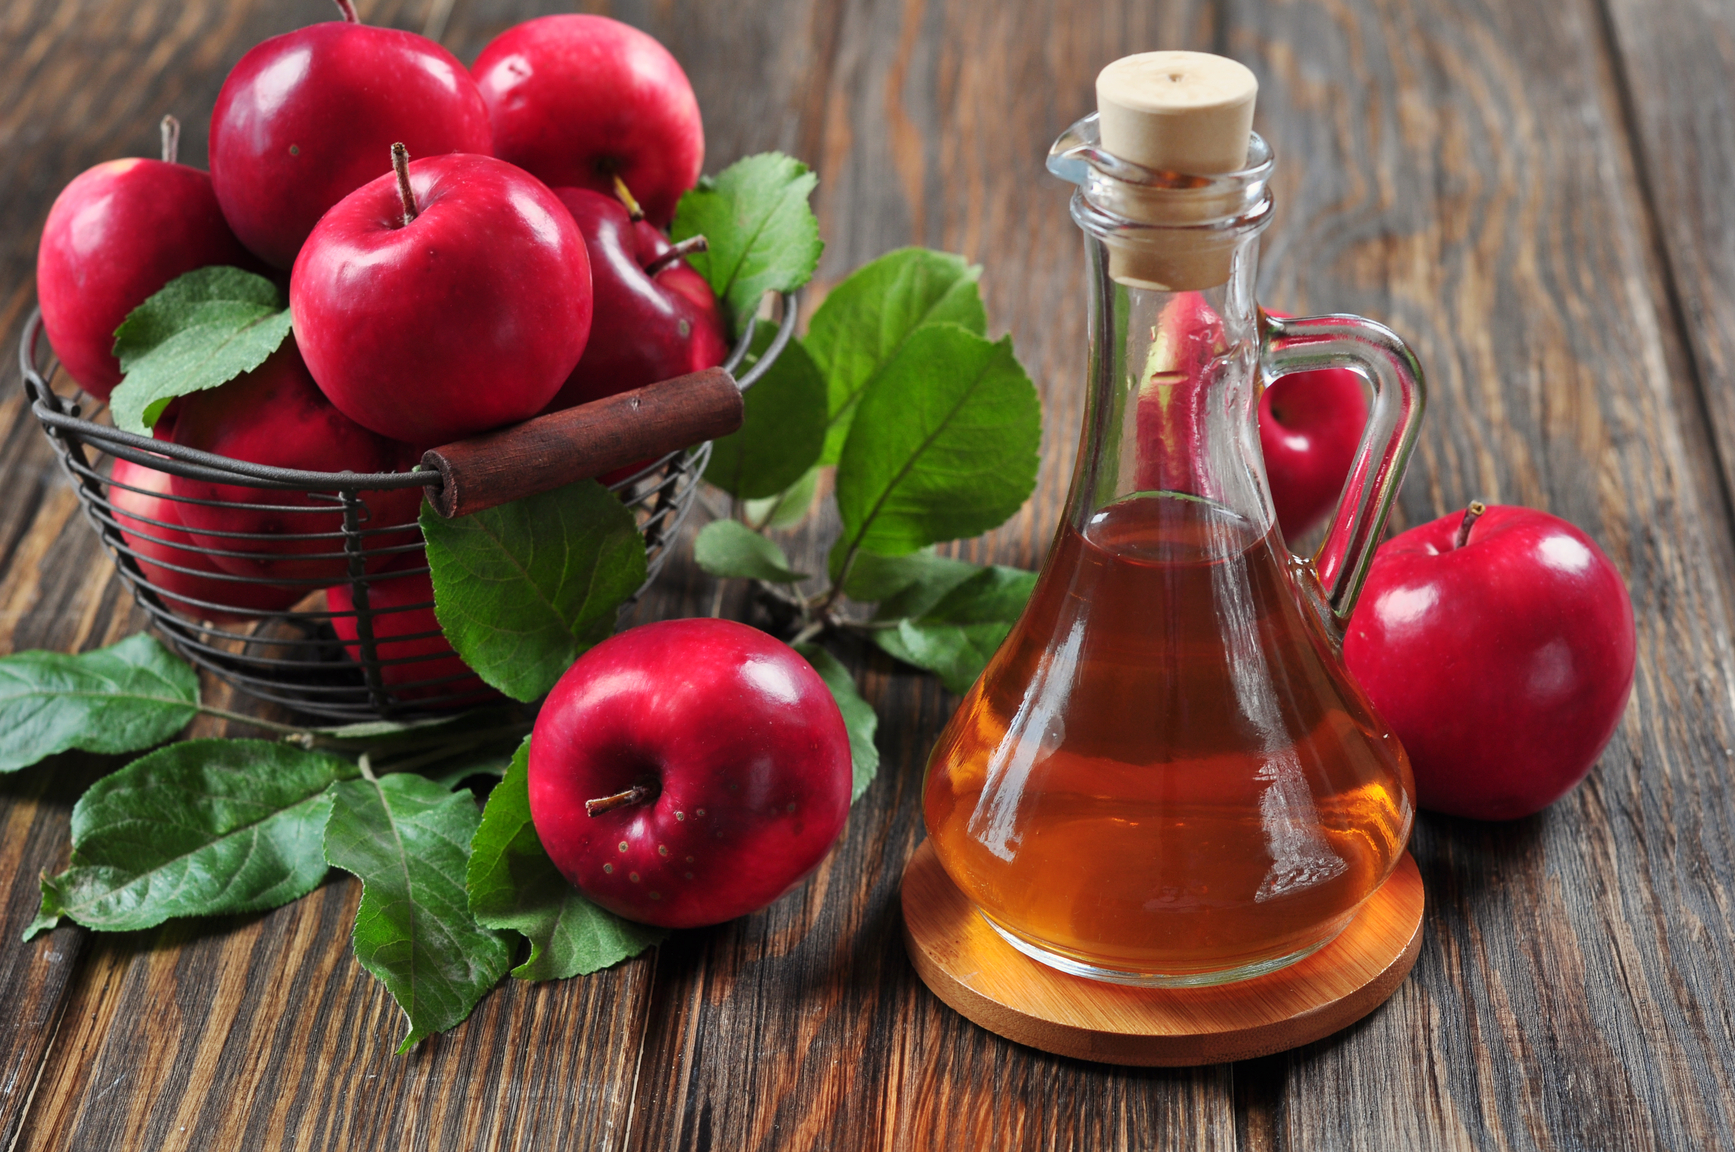
Apple cider vinegar is widely used both in everyday life as a preservative for winter preparations, and in folk dietetics - someone also uses it for treatment or weight loss (although the proven effectiveness of such methods of getting rid of excess weight is questionable!). You can buy apple cider vinegar at almost any grocery store. But which vinegar is better to take, how do you know if it is natural or synthesized? Can you trust the manufacturers and what is written on the bottle label? Can you make natural apple cider vinegar yourself at home?
In this post, we will tell you how to make apple cider vinegar at home using simple recipes, in an amount sufficient for family consumption. Even the taste of homemade natural vinegar is much more aromatic than store-bought vinegar, and you can't even talk about its usefulness, because you yourself control the cooking process.
Natural apple vinegar is suitable for compresses, and for rubbing, and for other cosmetic and hygienic procedures. Apple cider vinegar is also used for hair treatment, because it makes hair shiny and manageable, regulates the PH of the scalp, and to a certain extent helps to get rid of dandruff. The composition of natural apple cider vinegar includes organic acids, phenolic substances, a certain amount of sugars, aldehydes of esters of trace elements that are transferred from raw materials, as well as those formed as a result of the metabolism of acetic acid bacteria (ACB) in the process of making apple cider vinegar.
How is homemade apple cider vinegar different from factory-made apple cider vinegar?
The industrial version of apple cider vinegar, firstly, contains a higher percentage of acid - usually 6%, and in the home version it does not exceed 4%. Secondly, the homemade version of apple cider vinegar is completely natural and environmentally friendly, without the addition of synthetic flavors and dyes.
Thirdly, perhaps you are solving the problem of using substandard apples or, instead of throwing away the extra fruits. Finally, you can try to make it from purchased inexpensive market apples, in order to be convinced of everything in practice. We will try to tell you in detail how to make apple cider vinegar at home with your own hands.

Basic rules for making apple vinegar at home
Natural homemade apple cider vinegar is made from ripe, juicy sweet apples, possibly from cut, but high-quality, rot-free pieces. Whereas in industrial production, peel and cores are used for this.
You can use both apple pulp and apple juice to make natural apple cider vinegar at home. It is preferable to choose the sweetest, ripe and even overripe apples for vinegar, otherwise it becomes necessary to add sugar.

In addition to the pulp or juice of apples, sugar is used, which can be replaced with honey. There are sugar-free apple cider vinegar recipes. Other recipes provide for the addition of fresh or dry bread yeast, black bread slices or rye crackers.
Vinegar is a product of the fermentation of apple material, juice or apple pulp diluted with water. In the process of fermentation, alcohol is formed, which as a result is converted into acetic acid, which leads to the formation of a specific film on the surface of the wort, similar to kombucha. Such a formation is called a vinegar uterus and cannot be removed.

Apple cider vinegar can be produced at home both in three-liter glass jars and in glass bottles or bottles, thanks to the narrow necks of which, it is easy to fill them with sealing wax or paraffin for impeccable long-term storage.
1. A quick recipe for homemade apple cider vinegar
Apple vinegar according to this recipe will be ready for use in a month. To make apple cider vinegar at home, in addition to the apples themselves, you will need regular sugar, the amount of which depends on the sweetness of the apples. For sour apples, you need twice as much as for sweet varieties.
Ingredients:
- sweet ripe apples - 3 kilograms;
- granulated sugar - 150 grams;
- drinking water.
By quick recipe homemade apple cider vinegar is prepared like this:
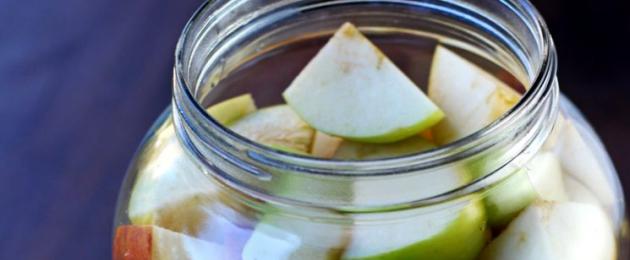
- Thoroughly washed apples, chop finely and pour over until smooth with a crush.
- Put the apple mass in a stainless steel saucepan or in a new enameled one and cover it with granulated sugar with water so that the apple mass is covered 4 centimeters higher.
- Bring the contents of the saucepan over low heat with occasional stirring to 70 degrees C and remove from heat.
- Place the container with vinegar wort in a warm place, excluding direct sunlight.
- During the fermentation process, it is necessary to stir the vinegar material twice a day in order to avoid drying out its top layer.
- After 14 days, strain the vinegar material through a gauze folded in three layers, and pour the resulting aromatic liquid into a sterile glass container of a larger volume, without adding at least 5-7 centimeters to the top, leaving space for the liquid to rise during subsequent fermentation.
- In this glass container, the vinegar is kept for two weeks, after which it, already ready, is carefully finally poured into a suitable sterile glass container, not topping up at least 2-3 centimeters to the top.
- Pour the cloudy sediment remaining in the preliminary container into a small glass container. After a certain time, when all the remaining liquid has settled well, you can separate it by carefully filtering it through cheesecloth folded in 4-5 layers and distribute it over the already poured bottles.
For high-quality storage, bottles of homemade apple cider vinegar can be sealed with durable corks, and bottles sealed with them can be dipped in a closed neck in molten paraffin. You can store such products indoors, in a dark and cool place.
2. Jarvis's apple bite
The process of making apple cider vinegar at home according to the prescription of the American doctor Jarvis takes a long time, but the reward is a product that is useful in composition.
Ingredients:
- sweet ripe apples - 2 kilograms;
- drinking water - 2 liters;
- natural honey - 200 grams initially and 100 grams again;
- fresh yeast - 20 grams;
- stale rye bread - 40 grams;
At home, according to Jarvis's recipe, apple cider vinegar is prepared as follows:
- Whole washed apples with pits and cores mince or rub on a coarse grater.
- Put the applesauce over the prepared clean glass jars and pour the indicated norm of drinking water.
- Add in equal proportions the amount of yeast, honey and rye bread crumbs indicated in the recipe, which will accelerate the fermentation of the wort.
- Cover the dishes with the wort with a cloth and place in a dark, warm place at an optimum temperature of 30 degrees C.
- Fermentation goes on for 10 days, but three times a day there is a need to stir it with a wooden spoon or spatula.
- After the due period has passed, strain the liquid through a gauze filter and measure its exact volume.
- Add and stir for each liter of volume 50 grams of sugar or honey and return to a dark and warm place for 50 days, after which the product will become absolutely transparent and ready for filling for storage.
It differs from the previous recipes given in that its source material is fresh juice of sweet and ripe apples, the number of which is indicated approximately, based on their juiciness and the required volume of such vinegar.

The only ingredient in this natural apple cider vinegar recipe is two kilograms of sweet, ripe apples. Plus, to make apple cider vinegar at home, you'll need a juicer or blender.
Apple cider vinegar from apple juice classic recipe prepare like this:

- Cut the washed ripe apples into slices and hold in the air until they oxidize, the appearance of a brown color.
- Turn the darkened apple pieces through a juicer or meat grinder and squeeze the juice through cheesecloth.
- Pour the resulting juice into a strong glass bottle with a reserve of space for fermentation, and put a hermetically sealed medical glove on its neck.
- Place the bottle in a warm place.
- Under the influence of gas, the glove should inflate as much as possible and then remove it. The fermentation process of the juice can last from weeks to one and a half months.
- Pour the fermented wort into a wide earthenware or wooden dish together with the vinegar uterus so that the space necessary for fermentation remains, at least 10 centimeters to the surface of the dish. And the fermentation itself takes place under a leaky lid or cloth for a week.

After one and a half to two months, fermentation will end and the apple cider vinegar will become transparent and ready for the final bottling after filtration into a container for storage under a hard stopper and, preferably, in the refrigerator.

4. Rustic honey apple cider vinegar recipe
The process of making rustic apple cider vinegar is similar to Jarvis's recipe, only without adding black bread to the container with apples and water, but natural honey is used.
Ingredients:
- fresh sweet apples - 1 kilogram;
- cold boiling water - 1 liter;
- natural honey - 200 grams;
- sugar - 100 grams;
- dry yeast - 20 grams.
A rustic recipe for apple cider vinegar with honey is prepared at home like this:
- Cut the washed apples into large pieces and mince, juicer or coarsely grate to get natural apple juice with pulp.
- Place the resulting applesauce or juice with pulp in a container suitable for fermentation, pour in the amount of water and add yeast and honey.
- Stir the mixture with a wooden spoon and place the container with it in a warm place for 10 days for fermentation, covered with a cloth napkin and stir the wort twice a day.
- At the end of the wort fermentation process, strain it, squeeze the cake and combine with the squeezed liquid.
- Pour the wort into a container with a wide neck, add sugar, stir until it dissolves and place it back in a warm place until final fermentation for one and a half to two months.
As soon as the vinegar becomes light and transparent, it is ready and should be filtered from the sediment and poured into glass bottles for storage under a hard cork.
5. A simple recipe for homemade apple cider vinegar with sugar
Making such vinegar at home is really easy: the necessary ingredients available and the heat for normal fermentation.
Ingredients:
- ripe sweet apples - 2 kilograms;
- sugar -200 grams;
- cold boiling water - one and a half liters.
Apple cider vinegar simple recipe at home prepare like this:
- Chop apples with peel and core.
- Put the resulting puree in a suitable glass container, add half of the sugar, pour in the required amount of cold boiling water and mix everything.
- Place the container with the wort in a warm place, cover with a cloth and leave to ferment for 3 weeks, during which it must be stirred 2-3 times daily.
- After three weeks, strain the wort, add the remaining sugar at the rate, stir and pour over the top of the jars, leaving them to ferment for 2 months.
- When the apple cider vinegar becomes transparent, it should be filtered and poured into glass bottles under a hard lid for further use and storage.
6. Recipe for apple cider vinegar with yeast dough
With the participation of yeast, apple cider vinegar ferments much faster. If you have no objection to yeast, then you should try making apple vinegar according to this recipe.

Ingredients:
- apples, ripe and sweet -1.5-2 kilograms;
- granulated sugar - 1 teaspoon;
- dry active yeast - 1/4 teaspoon;
- warm drinking water - a few tablespoons.
At home, according to grandmother's recipe, prepare apple cider vinegar as follows:
- Wash the apples and, squeezing the juice, pour it into a clay or glass container.
- Dissolve a mixture of granulated sugar and dry yeast in a bowl in 2-3 tablespoons of water, place in a warm place so that the dough comes up.
- As soon as it is ready: foam and fit, pour it into the apple cider vinegar wort.
- Put a medical rubber glove on the neck of the bottle and leave it in a warm place for 4 weeks.
At the end of 4 weeks, remove the glove and continue fermentation of vinegar with access to oxygen for another 2 months.
With all the simplicity of making apple cider vinegar at home, you need to remember that vinegar uterus (a substance consisting of cellulose and acetic acid bacteria, formed during the fermentation of alcohol-containing liquids in apple pulp, this "transparent mushroom" converts alcohols into acetic acid using oxygen from the air) should be saved to get the required amount of vinegar more quickly. In addition, it increases beneficial features apple cider vinegar and makes it taste good as a food condiment.
There is experience of using apple cider vinegar, it is also sometimes added to massage mixtures. But in all these cases, there may be contraindications associated with individual intolerance and diseases, for example, of the gastrointestinal tract: with an ulcer, gastritis with high acidity, hepatitis; pyelonephritis and urolithiasis.
Firstly, it is obtained from apple cake, skins, cores and other wastes from the production of juice concentrates.
Secondly, no one guarantees the high quality of raw materials - for example, that apples were taken from trees growing in ecologically clean areas.
And finally third, factory pasteurization strips apple cider vinegar of most of the vitamins, probiotics and enzymes that are so abundant in homemade drinks.
What is apple cider vinegar and how is it prepared

Vinegar is formed from apple juice as a result of its fermentation... But first, alcohol is obtained from it, which eventually becomes acetic acid. This usually happens in 1.5-2 months. During this period, the surface of the apple wort is overgrown with a milky-white gelatinous mass, which is called vinegar uterus.
The vinegar uterus, consisting of yeast fungi, probiotics and various enzymes, is three times more healing than vinegar itself. Just a teaspoon of this wonderful drug a day relieves joint pain, helps cleanse the skin and relieves the body of worms.
There are several important rules when making apple cider vinegar at home:
- select ripe fruits without signs of rot (but it is allowed to use carrion);
- fermentation is accompanied by the appearance of a foamy substance, which in no case can be removed (it is simply driven into the rest of the mass during daily stirring);
- use glass or clay dishes (metal and plastic buckets are not suitable for this purpose);
- pour the juice into the selected container so that its level does not reach at least 10 centimeters to the edge;
- stir the cooking vinegar with a wooden kitchen spatula or a wooden sushi stick;
- at the first stage of fermentation, it is better not to interfere with the juice at all and not to touch it (if this is not specifically spelled out in the recipe);
- in the second phase of fermentation, a vinegar uterus is formed, it does not need to be removed;
- to speed up the process, place the container with apples and juice in a warm and dark place (for example, in a warm pantry).
The best apple varieties for homemade apple cider vinegar
I met advice that apple cider vinegar is best made from sweet varieties of apples. Allegedly, their high content of fructose and sucrose facilitates fermentation, making the vinegar cook much faster.
However, such a product will not have such a balanced rich taste and useful properties as prepared from different types of apples.
In my opinion, the following proportion is optimal:
- 50% sweet apples;
- 35% sweet and sour apples;
- 15% sour apples.
Of course, sour apples are not easy to find today, so try 60% sweet and 40% sweet and sour fruits. Well, if there is only one sweet apple growing in your garden, then its fruits will turn out to be a very good organic apple cider vinegar!
Simple Recipe # 1. Sugar-Free Apple Cider Vinegar

This traditional recipe fans will especially like healthy eating as it does not contain commercial yeast and sugar.
- Rinse whole and strong apples under running water and cut them into wedges, after removing the core.
- Wait a while until the flesh darkens.
- Run the apple slices through a juicer and pour the separated juice into a glass or clay container.
- Pull a medical glove over the neck of the container, making one puncture in it with a sterilized sewing needle in advance.
- After 6-7 days in a warm room, the glove will fill with gas - this is a sure signal that it is time to pour the liquid into a wider vessel.
- After that, the container is loosely covered with a clean kitchen towel and kept warm for another 2 months. At a temperature of +25 ... 27 degrees, the juice ferments actively, gradually turning into the most valuable homemade vinegar.
- Then the apple cider vinegar is re-strained and further stored in the dark and cool.
Simple recipe number 2. Apple cider vinegar with honey
Ingredients: 5 large apples or pomace and leftovers from 10 apples, filtered water, 1 cup of liquid honey
Cooking method:
- Cut the apples into slices at least two to three centimeters in diameter (including seeds and cores).
- Transfer the apple mixture to a suitable bowl so that it is about ½ full.
- Fill the container with clean water until it covers the apples (but leave 5-10 centimeters of free space to the top).
- Dissolve honey in water and knead the mixture well with a wooden spatula.
- Cover the dishes with a linen tea towel or rolled gauze in several layers and secure the whole thing with a tourniquet.
- Move it to a warm corner in the kitchen and keep it there for 1-2 weeks with daily stirring.
- Are the apple slices no longer floating on the surface of the liquid? So the strong apple cider is ready. It's time to drain it into another container and close it again with a clean cloth.
- Leave the liquid to ferment for another 3-4 weeks. At the end of the third week, take a sample of the resulting product - if it is not strong enough, then let it "play" for another week or two.
Simple Recipe No. 3. Apple Cider Vinegar

Storage sludge is normal for homemade apple cider vinegar
Fruits that have fallen to the ground are stored very badly, so they urgently need to be recycled. One option is to make medicated apple cider vinegar using this simple recipe.
Ingredients: apple scavenger, water, sugar
Cooking method:
- Go through the fallen apples, rinse thoroughly and remove the soft barrel.
- Weigh the fruit and write down or remember the result.
- Cut them into pieces and mince them (or grind them with a blender).
- Transfer the apple gruel to a container of neutral material and fill it with water at a temperature of about 70 degrees. The water should cover the puree by 1 to 2 centimeters.
- Sugar is added to the resulting mass at the rate of 50 grams per kilogram of sweet apples and 100 grams for sour ones.
- After mixing, place the container in a warm and dark place and keep it under a towel for 10-14 days. It is advisable to stir the contents of the container daily.
- After this period, filter the semi-finished vinegar and pack the liquid into jars, filling them by ¾ of the volume.
- After another 2 weeks, drain the apple cider vinegar completely and store it tightly in the refrigerator or cold cellar.
Simple recipe number 4. Apple cider vinegar with yeast

Ingredients: 1,500 kilograms of apples, 2 liters of water (approximately), 200-400 grams of sugar (the more acidic the fruits, the more sugar you add), 20 grams of fresh yeast or ½ teaspoon of dry yeast
Cooking method:
- Grate the washed fruits on a coarse grater and transfer the apple mass to the prepared dishes (three-liter Soviet-type jars are best suited).
- Pour hot water over the apples so that it covers them by 2-3 centimeters. There should be 5-10 centimeters of free space at the top of the cans.
- Add half the sugar and yeast. Instead of yeast, you can take a dry crust rye bread weighing 40-50 grams (pre-soak).
- After mixing, close the neck of the container with any air-permeable cloth and put it in a warm and dark place for 10 days.
- After that, add the rest of the sugar to the liquid, stir and keep warm for another 40-60 days, or until the fermentation is completely extinguished. By this time, the vinegar will noticeably lighten, and bubbles will stop forming in the juice.
I also suggest looking at how quickly and easily homemade apple cider vinegar is prepared.
No, drinking it, of course, is not worth it. But to cook vinegar with your own hands for salads there, pickles and other culinary delights - why not? It will come out, if not useful, then certainly less harmful than the purchased diluted acid, and besides - tasty, aromatic, "with character." Moreover, there is not so much fuss with the preparation of this natural product - everyone can handle it!
Apple cider vinegar, along with wine vinegar, remains one of the most popular culinary spices. There are tons of homemade apple cider vinegar recipes - and, as usual, most of them are no good. What network "experts" do not recommend: they put alcohol yeast into the wort, and boil it, and they are trying to build something out of a store-bought chemical cider - fear! We will not produce essences, but will try to figure it out first with the theory, and only then - we will learn a simple, but the only sure way to make apple cider vinegar at home.
By the way, about vinegar for weight loss. Ladies' sites produce information about the benefits of vinegar in kilotons, it becomes already scary! Say, you drink a glass or two of healing liquid a day - and your waist just melts, and your appetite disappears out of nowhere. Of course it disappears! You just sprinkled acetic acid, where is there already ?!
Vinegar will help you lose kilograms only in one form - in a green salad without oil under chicken breast, after a good workout. And real, home-made apple cider vinegar will try to make such salads not only healthy, but also very tasty! And please do not drink vinegar on an empty stomach, as the "experts" advise! This is most harmful, especially for people with high acidity, of whom the majority among us! Gastritis and ulcers, of course, contribute to weight loss, but do you need it?
How to make apple cider vinegar at home - recipes and challenges
Want to make natural apple vinegar? Then immediately refuse store-bought ciders and apple wines - they, with a high degree of probability, are crammed with preservatives. Best suited for making vinegar is "live", freshly made apple wine, even one that has just finished its vigorous fermentation will do. Therefore, if you want vinegar, you will have to get confused with the production, or read about them in the relevant articles. However, the technology for preparing the base for homemade vinegar allows some liberties in comparison with wine.

I emphasize again - to make vinegar, we definitely need alcohol! The thing is that Acetobacteraceae - acetic acid bacteria - "eat" ethyl alcohol, converting it into acetic and other acids, just like alcohol yeast breaks down sugar, forming alcohol. Only the wine production process is anaerobic - without oxygen, but acetobacteria need this oxygen - ha ha- like air, otherwise no vinegar will come out.
Making vinegar can be challenging, but all of them can be avoided. Trying to figure out how to make apple cider vinegar at home if you are experiencing one of these problems.
- Acetic acidity does not start ... More than one week has passed, and the expected sour smell and cloudy film on the surface still do not appear? There are several solutions: a) wait some more; b) add to the wort yeast uterus(read about it in the corresponding section of the article); v) raise the temperature- the optimum temperature for the formation of vinegar is 26-35 ° С; d) forcibly infect the wort acetic acid bacteria.
Infection with acetobacteria is carried out with the help of fruit flies, which carry these microorganisms on their paws. You can breed flies by cutting an apple and simply leaving it on the table. The method is radical and not acceptable for everyone, but effective.
- Vinegar turns out cloudy ... This happens, and quite often. Solutions for the problem: filtration through cotton wool, exposure, filtration, filtration again and again. If you are too lazy to bother with the filter, take only clear, well-clarified wine. However, cloudy vinegar is in no way inferior to light vinegar except aesthetics.
- Insufficient acetic acid content ... The reason - either the souring is not over yet, or you have taken too weak wine. Acetobacteria feed on alcohol. So how do you make homemade vinegar from apples that haven't fermented enough ethylene? Regular sweet apples contain about 12% sugar, which gives us about 7% alcohol in wine. With further vinegar souring, these 7 ° will turn into 5% vinegar - just what you need for kitchen purposes! Accordingly, at the right technology vinegar does not require yeast or additional sugar.

And a little about yeast. In most cases, these same 7 ° can be fermented without yeast - that is, on wild yeast contained on the apples themselves and in the air. If for some reason the “savages” refuse to work, the wort will have to be artificially infected. Only I ask you, do not take baker's yeast - they are only suitable for sugar moonshine! Buy special wine or cider in a wine shop - 1.5 grams of CKD per liter of juice will be enough.
How to make homemade apple vinegar - a time-tested recipe!
Here is a complete recipe that includes making young apple wine and then converting it into vinegar. If you already have apple wine, just skip the first five points.
So, let's take ordinary sweet apples, for a start we will try to do without sugar and CKD. About 600 ml of vinegar should come out of a kilogram of such apples - the rest will go to "shrinkage and shrinkage".

- We extract juice from apples in any convenient way. You can squeeze it out through a juicer, cheesecloth, a colander, you can grind it, for example, with a meat grinder and leave it for a couple of days until the wort ferments, and then squeeze it out - as you prefer.
- We try the resulting juice. It should be sweet enough and not very sour. If there is a lot of acid, add a little pure unboiled water, up to half a liter per liter of juice. If there is not enough sweetness - feel free to add sugar, 50 grams per liter will be enough for a start.
- Cover the wort with gauze and leave in a warm place. After 1-3 days, signs of fermentation should appear - foam, hissing, leavened smell. If this does not happen, you will have to buy wine yeast or, at worst, make raisin sourdough - you can find out everything about it.
- Cover the fermented wort with a water seal, in extreme cases - with a rubber glove with a hole in the finger. We leave in a warm (18-23 °) dark place until the end of fermentation, this process can take from a week to four.
- When the shutter stops bubbling or the glove is deflated - the liquid should be decanted - removed from the sediment using a straw.
You have received young apple wine. If it is light, you can immediately start making vinegar. If turbidity is observed - before making apple cider vinegar at home, it is better to keep the drink under a water seal in a cool place for another month, periodically repeating decanting, until the wine is completely clarified.

- We put the finished raw materials for vinegar in an open container with a wide neck, covered with gauze, in a warm (26-35 °) place. After 3-7 and even more days, the vinegar souring should begin by itself - the wort will begin to emit a characteristic sour smell, and a film will appear on its surface, resembling a film on cooled tea, with dirty "kerosene" stains - and it should be!
- Then everything is simple - time will work for us. After 2-4 weeks, the smell of the liquid should intensify, become completely unpleasant - it means that everything is going according to plan, we can only wait.
- After 3-5 weeks, the souring process should end. This can be determined by the precipitation of a dense dark sediment, clarification of the liquid and a change in smell - now it will already resemble vinegar. It's time to filter the almost finished product and pour it into a sealed container - there is nothing for him to weather for nothing! It is recommended to keep the vinegar in a cool place for a month or two before use.
How to store homemade apple cider vinegar? Just like any other - just in the closet or kitchen cabinet. If the product does not come out acidic enough (you can check the taste), it’s better to move it to the fridge out of harm's way.
A little about the vinegar uterus
Sometimes, when preparing apple cider vinegar, a so-called "uterus" or "vinegar mushroom" appears in the container. It is formed from the very "tea" film on the surface, gradually grows and turns into a kind of dense jelly-like substance. Although this "mushroom" looks like rubbish, you shouldn't throw it out in any case - connoisseurs of vinegar for the vinegar uterus, forgive the pun, they will sell their mother - a valuable thing.

If you are lucky and the uterus has grown, it must be carefully collected from the surface, placed in a jar, filled with a small amount of vinegar (exclusively apple cider) and stored like the apple of your eye at room temperature. In the future, it will be possible to prepare vinegar from this jelly using a simplified technology - just add a little mass to the wine, which is supposed to be sour, then the souring process will begin and go much faster, and the vinegar itself will be of higher quality and tastier than usual.
You can use the uterus many times, but under certain circumstances it can die - "lethal outcome" is diagnosed by the darkening of the mass and by its position in the jar of vinegar - the dead "mushroom" falls to the bottom. At the same time, vinegar does not lose its taste and other qualities.

So we learned how to make apple cider vinegar at home - the recipe, as we can see, is not at all complicated, accessible even for beginners, the main thing is to have high-quality raw materials and a solid supply of patience. Remember - to make sure that you are consuming an exceptionally high quality product, it is best to do it yourself!
Homemade apple cider vinegar is a product that has unconditional usefulness, since it retains the entire mineral and vitamin complex that is part of the fruit.
Vinegar can be used not only in cooking, but also in cosmetology, in folk medicine, as an anti-inflammatory, analgesic and antibacterial agent, in addition, the product helps to normalize digestion, remove toxins and toxins from the body, break down fats and carbohydrates.
The simplest and most convenient recipes for how to make apple cider vinegar are detailed in the article.
The subtleties of cooking
Before you start studying recipes for making apple cider vinegar, you need to consider a few recommendations that will help you make a high-quality and natural product at home:
- Choose apples ripe, juicy, without rot and wormholes. All damaged areas must be trimmed before cooking. At the same time, it is better to give preference to sweet varieties, since the rate of acid formation depends on the sweetness of the fruit.
- Sugar used in recipes is best replaced with honey, making the product more useful.
- During fermentation, foam will appear on the surface of the workpiece. This is the most useful thing in vinegar and you cannot remove it, but only stir it with the rest of the liquid.
- You can only stir the contents of a jar or saucepan with a wooden spoon. Do not cook the product in a plastic container. It is necessary to use glass, enamel or earthenware for the workpieces.
- When pouring the juice or vinegar base into the fermentation vessel, leave at least 10 cm of free space.
- It is recommended to store the finished product at temperatures from +6 to -15 degrees.

Simple apple cider vinegar recipe
The easiest homemade apple cider vinegar recipe is without yeast. To make natural vinegar, you need to take overripe apples or sweet varieties of carrion.
Attention! To be sure that the fruits do not contain harmful components, have not been treated with chemicals or fertilizers, it is better to pick the fruits in your garden or in the country.
Ingredients:
- Granulated sugar - 50 g
- Apples - 1 kg
- Water.
- Pre-wash the fruits, cut off rotten and damaged areas, remove the seed boxes, "tails" from the fruit. Dry the apples, chop finely, transfer in a mortar or grind with a blender.
- Transfer the resulting gruel to an enamel or glass pan, sprinkle with granulated sugar and pour hot (but not boiling) water so that the liquid is 3-4 cm higher than the level of apples.
- Transfer the dish to a dark, warm place and leave for two weeks. It is necessary to stir the mass several times a day.
Attention! The optimum temperature for fermentation is 25-27 degrees.
- After the specified time, strain the liquid through cheesecloth folded in several layers and pour into jars.
Attention! It is not necessary to fill the glass container to the top, as the water will rise during fermentation.
- After 14 days, natural vinegar is completely ready. It remains to carefully pour the product into bottles, without shaking the liquid itself and the sediment, which can also be separately filtered through cheesecloth and refilled into containers. The container can be hermetically sealed with corks or corked with paraffin and stored in a cool, dark place with a constant temperature.

Jarvis Apple Cider Vinegar
Medical scientist Jarvis developed own recipe making apple cider vinegar, in which the beneficial properties of the fruit are not only preserved, but also multiplied. This recipe is a little more complicated and longer than the previous one, but the finished product turns out to be much tastier, healthier and better quality.
Components:
- Apples - 1 kg
- Honey - 100 g
- Yeast - 10 g
- Rye bread - 20 g
- Water.
Attention! The amount of water is calculated based on the fact that 800 grams of apple gruel will require 1 liter of liquid.
How to make apple cider vinegar at home:
- Ripe fruits, cut off from rot and wormy places, grate on a coarse grater or mince together with the peel and seeds.
- Transfer the resulting apple gruel to an enamel saucepan, earthen pot or glass container and pour warm water. Add the following ingredients to the mixture: honey or granulated sugar, bread yeast, stale bread. (When we mix the apple mass and water, about 1.8-1.9 liters of the mixture is obtained, you need to add 100 g of honey, 10 g of yeast and 20 g of rye bread for each liter, that is, honey 180-190 g, yeast 18-19 g, bread - 36 g) These components will help speed up the fermentation process.
- Cover the bowl with the apple mass with a napkin and place in a dark and very warm place. Withstand the mixture for 10 days, stirring several times a day with a wooden spoon.
- After a specified period of time, strain the workpiece, weigh and pour into clean, dry bottles. For each liter of the finished product, add another 100 grams of honey or granulated sugar. After that, mix the contents well, cover with gauze and leave warm for subsequent fermentation. This will take 40-50 days.
Attention! As soon as bubbles stop appearing on the surface, the drink becomes transparent and a dense sediment forms at the bottom, the product can be filtered and poured into a clean container.
The strength of this vinegar is 4-5%. At the same time, the homemade product turns out to be soft, pleasant to the taste, rich, spicy and aromatic. It can be used not only for medicinal purposes, but also as a dressing for salads, a cosmetic product.

Natural vinegar without sugar
You can prepare natural vinegar using a minimum of ingredients. You will need for this:
- Apples - 1.5 kg
Cooking process natural vinegar next:
- Cut ripe apples into large slices and leave in the light until dark. Then squeeze the juice out of the fruit.
- Pour the resulting drink into a glass or clay container. Put a rubber glove on the neck of the container. Transfer the container to a dark, warm enough place. During the first 10-14 days from the beginning of fermentation, the glove on the neck will inflate, and when it turns into a "ball", you need to pour the liquid from the vinegar uterus formed on the surface into a wide saucepan, filling the container by no more than 2/3 of its volume.
Attention! The fermentation process will take place faster if the area of contact of apple juice with air increases.
- Cover the container with juice with a napkin and leave for 40-60 days.
- When the liquid stops boiling and becomes transparent, the fermentation process is over and the finished product must be filtered, and then bottled.
It is important to know that vinegar becomes even more beneficial over time. In this case, after a few months, an orange sediment forms at the bottom of the bottles. For subsequent use, the product must be filtered. Store acid in a dark, airtight bottle out of the reach of children.
Apple cider vinegar: a convenient recipe
To make natural apple cider vinegar with your own hands without the hassle and waste of time and effort, you will need to take:
- Apples - 2 kg
- Purified water - 2 l
- Granulated sugar - 260 g
Product and result
- Wash and dry the apples well.
- Pour the fruits into a glass container, add water and cover with granulated sugar. Shake the workpiece. Close the neck of the container with a cotton towel, secure the structure with an elastic band.
- Leave the jars in this form in a warm dark room for 3 months. Stir the contents of the vessel periodically.
- When the apples are at the bottom, the pungent smell will disappear and the liquid will become transparent - a natural homemade product is ready.
- Strain the vinegar through a towel and pour into clean, dry bottles. Seal the container tightly with corks.
Apple cider vinegar from waste
For making apple vinegar according to this recipe, both whole ripe fruits of sour varieties and cake left over from fruits processed into juice are suitable as a base.
Ingredients:
- Water - 1 l
- Apples - 1 kg
- Granulated sugar - 150 g
- Apple cider vinegar or table vinegar - 100 g
Attention! Instead of vinegar, you can also use the uterus from a previously prepared homemade product in the preparation.
The procedure for preparing a natural "elixir" is as follows:
- Rinse the apples, dry, cut off spoiled areas and core. Fold the fruit wedges into a jar, filling the container halfway.
- Add the container to the level of the "shoulders" with cold water, in which to pre-dissolve granulated sugar or honey.
- Leave the vessel at room temperature for 10 days, cover with gauze to prevent insects from getting inside.
- After the specified time, strain the liquid and mix with vinegar.
- Withstand the workpiece for another month in a warm place.
Attention! If the apartment is cool, then the fermentation process can take 2-3 months.
- Strain the finished product several times through cheesecloth and store it cool.
Apple cider vinegar
Having prepared apple cider vinegar at home according to this recipe, you can get a truly healthy and tasty product... A liquid with a sour taste is suitable as an ingredient for preserving vegetables and fruits, as a salad dressing, or as a remedy that helps to normalize bowel function, acid-base balance, and improve overall health and mood.

Products:
- Apples - 2 kg
- Yeast - ¼ tsp
- Granulated sugar - 1 tsp
The cooking process is as follows:
- Wash the apples, wipe them off, cut off the rotten areas from the fruits, remove the seed boxes. Squeeze the juice from the fruit. Pour the drink into a clean, sterile jar.
- Mix yeast with granulated sugar and dilute in a little warm water. When the resulting dough is covered with a "frothy cap", pour it into a container with juice.
Attention! To speed up the fermentation process, you can put another crust of brown bread in the container.
- Put a medical glove on the neck of the can so that air does not get inside. During fermentation, carbon dioxide will fill the glove and, if it bursts, you will need to take a new one.
- Thus, the juice must ferment for 4 weeks until the fruit sugar is completely converted to alcohol. The result is a drink that resembles young wine. And in order to process the product into vinegar, you need to leave the liquid to ferment further, but already open. To do this, the contents of the jar must be poured into a saucepan, covered with a cloth and left in a warm place for 1.5-2 months.
- As soon as the unpleasant smell disappears, the vinegar is ready. The liquid will need to be filtered and filled into sterile bottles.
It would seem that such a trifle - a teaspoon in a salad and a couple of tablespoons for pickling - and that's it, the dish is radically transformed! Aside from the obvious reasons, there are plenty of options for adding vinegar. A few drops of vinegar will help bring a new familiar flavor to life, be it a stew, roast, or bean garnish. It is the vinegar acid that will enhance the spicy accents of the spice. And only it, vinegar, will add completeness and gastronomic chic to the dish.
But there are, as they say, vinegars and vinegars. There is table vinegar - an aqueous solution of essence, made according to a certain technology. And there are fruit and berry vinegars obtained as a result of natural fermentation, the most famous of which are wine, balsamic, and apple cider vinegars. These vinegars can be made from almost any fruit. Moreover, cook it yourself, at home. And if you take into account the price of high-quality fruit and berry vinegar, then the business also becomes economically feasible.

Homemade vinegar in a nutshell
Making homemade vinegar takes time. However, the "passive" time. It takes several months to ripen, which are mainly spent on waiting. In general, everything is very simple. The main prerequisite for making good vinegar is choosing the raw materials. The rule is: the more ripe the berries are, the better.
To prepare the vinegar, the berries are not washed in order to preserve the "wild" yeast. The berries are crushed and mixed with sweet water, after which they are left for active fermentation in an open container (jar, enamel saucepan). The fermentation process should take place away from direct sunlight, so that they do not suppress the growth of yeast fungi, which will turn the berry base into vinegar. Active fermentation lasts 2 weeks + 4 days.
After a stage of active fermentation, homemade vinegar is filtered and left for passive fermentation. This takes 4 to 6 weeks. During this time, acidity builds up in the vinegar, and it becomes transparent. When the ripening process is complete, the vinegar is recommended to be bottled. You can cook a large batch at once during the season - the fruit and berry vinegar will be stored for 8-9 years.

What vinegar are we going to make today? Homemade vinegar made from a mixture of red and black currants.
So, get acquainted: currant vinegar... It has a characteristic subtle, not too bright aroma, which makes it an excellent all-purpose vinegar for adding to many dishes.
Cooking time: about 2.5 months / Yield: about 1.5 liters
Ingredients
- red currant 500 g
- black currant 250 g
- sugar 120 g
- water 1.5 l

Preparation
Big photos Small photos
Stage I. Active fermentation. Pour a glass of water from the amount indicated in the ingredients into a saucepan and bring it to a boil. The rest of the water should be cool, but you also need to boil it first (or use filtered water).
Pour sugar into a three-liter jar.

Pour boiling water into the sugar and stir until completely dissolved.

Then pour all the remaining cool water into the jar. The water temperature in the jar should eventually turn out to be at room temperature.

Now take care of the berries. Place them in a deep bowl.

Use your hands or a pestle to crush all the berries.

Send the pulp and juice to a jar of sweet water.

Cover the jar with 4-layer gauze or a piece of glueless non-woven fabric. Put an elastic band on the neck so that nothing gets inside the can (for example, midges that will try to get inside when the fermentation process begins - oh, how active they are!).

Move the jar to a dark place. Stir the mixture daily for 2 weeks. During this time, the vinegar will go through a stage of active fermentation. First, the berries will float upward and numerous air bubbles will be visible.

Then gradually, as the yeast develops sugar, fermentation will begin to fade, and the pulp will sink to the bottom.

After two weeks of stirring, leave the vinegar alone for another 4 days. All the berries will settle to the bottom.

Filtration. Strain the vinegar through a sieve with cheesecloth to filter out the liquid.

Squeeze the pulp thoroughly, and pour the vinegar into a clean jar. At this point, the vinegar will still be cloudy and weak - it will taste only slightly sour.

Stage II. Passive fermentation. Cover the vinegar jar in the same way as you did first, with gauze or non-woven linen. Remove the vinegar jar from a dark place and leave it alone for 4-6 weeks. Now the stage of passive fermentation begins, during which there is no need to stir the vinegar.
During this time, the vinegar will turn transparent (can you say so?), A precipitate will fall out, and films may form on the surface. Make sure that these films are free of mold - this will indicate that the vinegar is spoiled, and it will simply need to be poured out.
Why does mold form? Mold can form if, at the time of filtration, the vinegar has not reached the required degree of acidity, and the acid does not suppress the development of mold, as it should during the normal process of making homemade vinegar. That is, the technology related to the fermentation time is simply violated.

When the vinegar is clear, use a dropper tube to carefully remove it from the sediment.

Pour vinegar into bottles, cover and store at room (but not too high) temperature.
Be sure to try your homemade vinegar - it should be distinctly sour. Storage is good for vinegar - it makes it even stronger.
- In contact with 0
- Google+ 0
- OK 0
- Facebook 0