In the article, step by step, with photographs, it is shown how independently and it is very simple to sharpen the cutting surface of the grater with an ordinary drill, and most importantly quickly, if you do not disassemble it like I did.
Any grater for vegetables during operation, over time, loses its cutting properties. Sharp edges that turn vegetables into minced meat or delicately cut strips become dull and torment begins. This is easy to fix, and I'll show you how below. Almost all graters are made according to the same principle, and this instruction will practically apply to any type of grater.
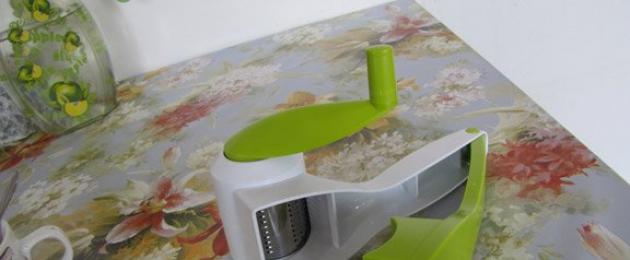
Not very long ago, my wife bought a cute teatrochka for vegetables of not very large sizes and, as often happens, put her purchase in the closet. It looks all right.

Then, when it was necessary to grate the vegetables, she took it, tried to use it for its intended purpose and was disappointed with this seemingly high-quality thing. She did not want to fulfill her functions. I examined it and found that the cutting edges on the grater are completely blunt. Written in German quality, but as often happens, apparently made by our neighbors from China. Whether you like it or not, you need to sharpen it. But before sharpening, I decided to disassemble it for better sharpening. It is easy to understand and the photographs show how to do it. The main thing is not to rush and do everything neatly, with feeling, sensibly, with arrangement.


Here is the hero of the occasion who does not want to work the drum.


In order to disassemble the drum for sharpening, you need to remove the retaining ring from the latches. Be careful not to break them. Gently pull the drum to the left as shown in the photo.


We measure the diameter of the holes, I got 2.5 mm, we take the same drill, preferably a very good and new one. We insert it into a screwdriver, drill, drill, etc. The main thing is that there were as many revolutions as possible and at a large angle, as in the photo, we drill all the holes. The edges are very sharp. Q.E.D.

If desired, these sharp edges can be made even sharper if you use a drill and a diamond bur to go through all the holes, but this is optional. And severely sharp edges can injure your hands. The method of sharpening with a diamond bur can be used constantly, if you do not allow a strong bluntness of the cutting edges of the vegetable cutter.
This method can be used to sharpen most vegetable graters. It is only necessary to select drills according to the diameter of the holes, since there are different graters.
Tests on vegetables have shown the method works great.
That's all. Ask questions, comment, share on social networks.

How did you get these wrinkles! This phrase is repeated every day by 1000 women, getting up in the morning on the alarm clock and looking in the mirror. Especially kill those that are formed near the lips. Over time, they turn into deep folds, and there's nothing you can do about it. This opinion is erroneous, because the modern pharmaceutical industry produces a unique drug called Solcoseryl. Women are already using it for wrinkles and the results are amazing. This drug is produced in two consistencies: ointment and gel.
Solcoseryl as an ointment
If you apply it 2 or 3 times a week before bedtime, you will get perfectly hydrated skin by morning. This pharmaceutical agent does a lot of things in the body: it helps to improve cellular respiration, stimulates glucose metabolism, and makes the skin regenerate. And this is a small fraction of what Solcoseryl is capable of.
Immediately, of course, the result is not noticeable, but after 20 days you will notice that you, like Bulgakov's Margarita, will begin to glow from the inside. This will leave your skin feeling satin.
Solcoseryl as a gel with Dimexidum
A rejuvenation procedure with such a consistency should be carried out once a month and not more often. True, do not forget to test Dimexide: in some women, it causes allergies. If the tests of a small area of the body were successful, then dilute Dimexide, adhering to a 1:10 ratio. Otherwise: 1 tsp. preparation for 10 tsp. water. Moisten a cotton swab with a solution, apply to the face and let dry.
When the gruel is dry, apply a thick layer of spruce. Please note that the composition will dry out periodically, so prepare a small spray bottle to wet your face with water. The whole procedure will take about 60 minutes, then use a napkin or tampon to remove the residue and apply a hypoallergenic light cream. This procedure will help smooth the skin: fine wrinkles will disappear, large folds will be noticeably smoothed out. Regenerating effect, as they say, on the face!
But this is not enough. For those who would like to achieve greater effect, Solcoseryl from wrinkles is only part of the fight against aging. Be sure to do a deep exfoliation. This Hollywood recipe has reached our women.
Go to the pharmacy and buy liquid calcium chloride, it is sold in ampoules. There you can also buy domestic-made baby soap or visit a store. Avoid fancy Baby Mix and other flavored fats. With them, the procedure will not be effective. Open 2-3 ampoules, moisten the tampon liberally and wipe your face 2-3 times. If it tingles a little, then this is normal. Let it dry naturally, lather your hands until a rich foam forms and rub it into the skin until the calcium chloride begins to roll off. It is these pellets that will remove dead skin cells, clean out the dirt and free the pores for breathing. After scrubbing everything off your face, pat your face with a warm towel, lubricate it with a non-greasy cream. You will get a smooth, silky face. That's the whole peeling!
In the article, step by step, with photographs, it is shown how independently and it is very simple to sharpen the cutting surface of the grater with an ordinary drill, and most importantly quickly, if you do not disassemble it like I did.
Any grater for vegetables during operation, over time, loses its cutting properties. Sharp edges that turn vegetables into minced meat or delicately cut strips become dull and torment begins. This is easy to fix, and I'll show you how below. Almost all graters are made according to the same principle, and this instruction will practically apply to any type of grater.
Not very long ago, my wife bought a cute teatrochka for vegetables of not very large sizes and, as often happens, put her purchase in the closet. It looks all right. 
Then, when it was necessary to grate the vegetables, she took it, tried to use it for its intended purpose and was disappointed with this seemingly high-quality thing. She did not want to fulfill her functions. I examined it and found that the cutting edges on the grater are completely blunt. Written in German quality, but as often happens, apparently made by our neighbors from China. Whether you like it or not, you need to sharpen it. But before sharpening, I decided to disassemble it for better sharpening. It is easy to understand and the photographs show how to do it. The main thing is not to rush and do everything neatly, with feeling, sensibly, with arrangement. 

Here is the hero of the occasion who does not want to work the drum. 


In order to disassemble the drum for sharpening, you need to remove the retaining ring from the latches. Be careful not to break them. Gently pull the drum to the left as shown in the photo. 


We measure the diameter of the holes, I got 2.5 mm, we take the same drill, preferably a very good and new one. We insert it into a screwdriver, drill, drill, etc. The main thing is that there were as many revolutions as possible and at a large angle, as in the photo, we drill all the holes. The edges are very sharp. Q.E.D. 
If desired, these sharp edges can be made even sharper if you use a drill and a diamond bur to go through all the holes, but this is optional. And severely sharp edges can injure your hands. The method of sharpening with a diamond bur can be used constantly, if you do not allow a strong bluntness of the cutting edges of the vegetable cutter.
This method can be used to sharpen most vegetable graters. It is only necessary to select drills according to the diameter of the holes, since there are different graters.
Tests on vegetables have shown the method works great.
That's all. Ask questions, comment, share on social networks. 
You May Like:
- How to beautifully disguise a battery? Interesting ...
- Any sewing machine is sold with a certain ...
- SHE TAKEN A PIECE OF YARN AND WRAPED ON THREE FINGER HANDS! ...
Today, a grater is a common thing for grinding a wide variety of products. Everyone has long been accustomed to this kitchen element, but, for sure, few people thought about where the grater came from and where it first appeared.
Meanwhile, this tool of irreplaceable assistant was invented more than 2 thousand years ago in the Roman Empire. In those years, cooking for dignitaries required a special approach and accuracy.
True, pieces of food were crushed with devices made of not quite familiar materials - stones, animal skins.
But in terms of their functionality, the devices were already similar to modern graters used by housewives and professional chefs around the world.
The "new history" of graters dates back to the beginning of the 15th century, when one of the little-known inventors presented to the inhabitants of France a small metal sheet with notches to grind the popular parmesan seasoning.
This greatly facilitated the life of the servants of the royal courts and wealthy people. After another 3 centuries, a more advanced drum-type model was introduced, and today's grinders are the distant ancestors of those graters.
Varieties of graters
The history of manual shredders began with the simplest options, but today manufacturers offer dozens of models. Although for several centuries the graters have not gone far from the general engineering idea: they were just improved, making them lighter in weight, easier to use and more versatile in everyday life.
Today the number of interpretations is off the charts: from mechanical hand tools to electric multifunctional harvesters, they are also considered graters. But the most popular is the beloved old universal grater.
The classic model can be bought in any home goods store, and its cost is significantly lower than all analogues. But even this type of shredder has several varieties.
Universal grater - a metal sheet with notches, or a polyhedron of several blades with different types of notches. Such devices differ in the number of edges, the size of the notches and the shape of the cutting edge.
Notches can be medium, large and small, but the functionality of the grater depends on the edges: the more, the better.
Today, manufacturers produce traditional graters with a touch of modernization - complete with a plastic container into which the grated product falls. Very comfortably. The use of additional dishes is not required, moreover, it takes up almost no space.
Among other types of devices, new highly specialized graters can be distinguished, as a rule, for one type of product:
- Files. Long narrow file-like device. Used by professional chefs when it becomes necessary to decorate a dish just before serving.
- Parmesan graters. Of course, it is advisable to buy such a device when Parmesan often appears on the table. As a rule, such devices are made of plastic in bizarre shapes.
- Zest grater. With the help of such a device, you can easily remove the zest and white bitter skin from any citrus fruits.
- Chopper for nutmeg and ginger. Very small devices have appeared relatively recently, but have already gained popularity among fans of a healthy lifestyle and supporters of proper nutrition.
- Puree grater. Another highly specialized grater designed for chopping fruits and vegetables.
Of course, these are not all types and variants of mechanical hand devices. But I must say that any universal multifaceted grater has all the facets for grinding the above products. Is that parmesan with a classic grater will be more difficult to grind.
However, all graters have one common drawback: dull blades after some time of use. This applies to both hand-held and electrical products. In this case, you will have to solve the problem by sharpening the blades.

How to sharpen the grater yourself
Dull grater blades cause a lot of hassle: the food has to be rubbed longer and with some effort. Boiled vegetables can even turn into porridge. Therefore, every housewife, who often uses such a multifunctional device, periodically asks the question of how to sharpen the grater and whether it can be done.
This can be done in several ways. But immediately before starting the procedures, you must thoroughly clean the kitchen unit from dirt using a sponge and dishwashing detergent.
There are at least three ways to sharpen:
With a knife
It will take some skill and accuracy, especially if the knife is sharp. The tip of the blade must be pushed under each notch of the grater in turn and bend the blades of the device.
This option is suitable if the grater is already completely worn out, it is not possible to sharpen it, and you need to grate the vegetables urgently. The curved teeth will not become sharper, but they will act deeper on the food, which will allow you to quickly grate the required amount.

Sandpaper
To sharpen the cutting elements of a power trowel, you will need several pieces of sandpaper of different grain sizes on a fabric backing.
Using this method, the risk of cutting yourself is minimized, and the grater itself will become sharp in a few minutes. For sharpening, it is necessary to roll up sandpaper in several layers so that it resembles a bar in shape: it is more convenient to work as a "tool" this way. If you run it a few times over the surface of the kitchen fixture with little effort, you can see a good result.
- In contact with 0
- Google+ 0
- OK 0
- Facebook 0